dinsdag 28 december 2010

Baby girl slinger/ Baby girl garland


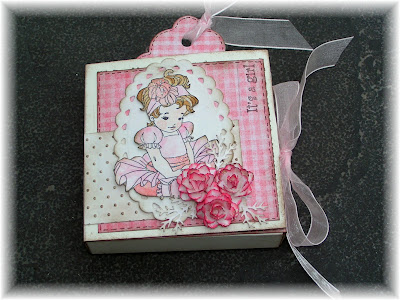
Een tijdje terug maakte ik een mooie baby slinger voor een meisje. Met haar naam erop was het een prachtig mooi kraamcadeautje. Ik maakte van karton ook nog een leuk doosje, waarin je de slinger op kunt bergen. Erg leuk om te maken en ook erg leuk om te geven. Je kunt de file hier downloaden (SCAL 2.0).

Some time ago I made this beautiful baby garland for a little girl. I added her name and it is the perfect gift. I made a box of chipboard, so you can store the garland away. It's nice to make this project, but it is also nice to give away. You can download the file here (SCAL 2.0).

zaterdag 23 oktober 2010

Spookhuis/ Haunted House

Morgen ga ik mijn huis in Halloween sfeer toveren. Ik heb al wat dingen gemaakt, maar wilde nu eens iets maken wat heel snel af is. Nu dit spookhuis is snel gesneden en ook snel in elkaar geplakt. Snij alle delen van zwart papier, behalve pagina 3. Snij deze van dessinpapier. Zo heb je echt behang in je huis. Er zit expres geen dak op, zodat je er een glaasje met waxine lichtje in kunt zetten. Als je er echter een bodem in doet een een plastic zakje, dan kun je er natuurlijk ook iets lekkers in doen (popcorn misschien?). Wil je ook een huisje maken, klik dan hier voor de file (SCAL 2.0).

Tomorrow I will turn my home into Halloween mood. I made some things, but wanted to make something quick. This haunted house is cut quickly and made easily. Cut all parts of black paper, except for page 3. Cut this using patterned paper. Now you have some wallpaper for your house. There is no roof, so you can put a glass and candle in it. If you make a bottom and put a plastic bag in it, you could also use it as a party favour (fill it with popcorn). Would you like to make your own house, then you can click here for the file (SCAL 2.0)

Kerststoel/ Christmas chair

Gisteravond heb ik samen met mijn vriendin Saskia lekker zitten knutselen. Zij kwam aan met een ezelkaart met een stoel daarop. Ik heb het patroon omgezet, zodat het met de cricut te snijden is. Het idee komt uit het hobbyjournaal.
Snij de stoel uit dessinpapier en maak een kaart van 13 cm x 26 cm. Vouw de kaart dubbel en haal van de bovenkant twee randen van 4,5 cm af. Je houdt nu in het midden een strook 4 cm over. Deze vouw je dubbel. De stoel kan hierop vastgeplakt worden. Versier de onderkrant van de kaart, zodat het lijkt of er een kleedje onder de stoel ligt. De stoel is makkelijk in elkaar te plakken. Snij nog wel twee strookjes van 1 cm x 7,5 cm. Deze gebruik je als zitting. Gebruik foamtape om hem in elkaar te zetten. Nog een Magnolia kleuren en je hebt een leuke kerstkaart.
Wil je deze kaart ook maken, dan kun je hier klikken om de file voor de cricut te downloaden (SCAL 2.0). Wil je een patroon van de stoel, dan kun je hier klikken.

Yesterday I was crafting with my friend Saskia. She had made an easelcard with a cosy chair. I turned the template over in a cricut file. The idea came from a dutch magazine called Hobby Journal.
Cut the chair using patterned paper. Cut two stripes of 1 cm x 7,5 cm, to make a seat. Use foamtape to put the chair together. Cut a card 13 cm x 26 cm. Fold it in half. Cut of a stripe of 4,5 cm of both sides of the top card. You are left with a stripe of 4 cm in the middle of the card. Fold this in half and attach the chair on top of it. Cut a piece of paper for the bottom of the easelcard so it looks like there is a carpet on the floor. I used a Magnolia stamp to make a Santa in the chair.
If you would like to make the chair, you can click here for the cricut file (SCAL 2.0) of you can click here for the template.

woensdag 20 oktober 2010

Halloween slinger/ Halloween garland


Ik had nog wat papier over van het halloween canvas. Ik vond het leuk om er nog een leuke halloween slinger bij te maken. Ik heb daarvoor 5 keer een vlaggetje gesneden met de cricut. De onderste vlag met de schulp rand heb ik uit oranje papier gesneden en de vlaggen er bovenop heb ik 6 keer uit zwart en 4 keer uit dessinpapier gesneden (making memories). Op de oranje vlag plakte ik aan twee kanten de zwarte driehoek of die van dessinpapier. Met de naaimachine heb ik ze doorgestikt. Verder versierde ik de vlaggen met stickers van Cosmo Cricket, restjes papier en gestanste vormen van de cuttlebug en sizzix. Ik plakte er nog wat leuke blaadjes op en daarna heb ik het lint aan de bovenkant gestickt. Met een lijmpistool nog wat grote herfstblaadjes erop en de slinger is klaar. Deze slinger is overigens ook leuk om te maken voor een baby of verjaardag. Wil je ook een keer een slinger maken, klik dan hier om het bestand te downloaden(SCAL 2.0). Veel plezier!!!

I had some leftover paper from my halloween canvas. I wanted to make a Halloween garland. I cut the flags 5 times using my cricut. Just cut 5 scallop triangles with orange paper and 6 triangles of black paper and 4 triangles of dessin paper (making memories). I glued the triangles to the scallop on both sides and used my sewing machine to stich them. I then embellished them using Cosmo Cricket stickers, some leftover paper and died shapes from sizzix and cuttlebug. I added some small leaves. Then I stiched them to some ribbon using my machine. I added some leaves using my glue gun. I think you can make a nice baby garland or birthday garland with this file too. Would you like to make this garland? Click here to download the file (SCAL 2.0). Have fun!

Halloween canvas


Wat een pret is het om te werken met canvas. Samen met mijn vriendin Connie een avond lang zitten plakken en verzinnen met dit canvas als resultaat. We hebben er voor een extra leuk effect ook nog lampjes in verwerkt. We gebruiken 4 canvassen 1 van 30 cm x 30 cm, 1 van 15 x 15 cm, 1 van 20 cm x 20 cm 3D en 1 van 20 cm x 20 cm. Deze zijn met schroeven aan elkaar gezet. De leuke spulletjes zijn van Xenos en het papier is een pakket van Cosmo Cricket. Verder gebruikten we cuttlebug en sizzix stanzen. Wij waren erg blij met het resultaat. De grote boom is trouwens met de cricut gesneden.

What joy is it to work with canvas. Together with my friend Connie we enjoyed ourselves all through the night. We added some lights for an extra spooky result. We used 4 canvasses, 1 of 30 cm x 30 cm (12 inch), 1 of 15 cm x 15 cm (6 inch), 1 of 20cm x 20 cm 3D and 1 20 cm x 20 cm. We screwed them all together. We used some cute halloween stuff and a paper by Cosmo Cricket. We also used cuttlebug and sizzix dies. The big tree is cut using our cricut. We are very pleased with the result.

zondag 29 augustus 2010

Ezelkaart ster kerst/ Easelcard star christmas


Hierbij de beloofde kerstkaart. Ik heb 1 ezelkaart gemaakt. Ik heb de losse ster nu twee maal gebruikt en versprongen opgeplakt. De kaart is echter ook heel erg leuk als gewone kaart. Daarom heb ik de tweede kaart als gewone kaart gemaakt. Je kunt de file downloaden in het bericht hieronder.
Here is the promised christmas card. I made one easelcard. I cut the single star twice and used it twice on the front. You can also make a great normal card with this file. I did this with the second card. You can download the file in the post below this message.

Ezelkaart ster/ Easelcard star


Op het hoekje was er een baby geboren (ik wist eigenlijk niet eens dat ze zwanger was). Voor het raam hangt een slinger met de naam van de baby. De kleuren ervan zijn blauw, lichtgroen en oranje. Aan de spullen voor het raam van de babykamer is te zien, dat hier ook deze kleuren zijn gebruikt. Aan de slag dus met de naam van de baby en de genoemde kleuren.
Ik heb er maar weer eens een ezelkaart van gemaakt met deze keer een ster erop. Op de vlaggetjes heb ik zijn naam gezet met witte rub-on letters. Ze zijn met foamtape opgeplakt, zodat de ster er tegen kan leunen. Als je hem leuk vind, dan kun je hem natuurlijk ook zelf gaan maken. Klik hier voor de SCAL 2.0 file van de kaart. Hij is overigens ook leuk als kerstkaart. Ik ga er straks eentje maken en zal hem erbij zetten.

This week I saw a baby was born in the same row houses where I live ( I didn't even knew she was pregnant). In the window was a garland with the name of the baby. The colours where orange, blue and green. I saw the decoration in the baby room in the window and they where the same colours. I knew right away what I would make.
I made an easelcard using the same colours as the garland in the window. I even made a garland on the card with his name. I used white rub-on letters. I taped them down with foamtape so the star will stand up. I think it would be a nice christmas card too. I will make one tonight and post it. If you want the file you can download it here (SCAL 2.0).

zondag 15 augustus 2010

Canvas met huis/ Canvas with house


Weer kon ik het niet laten om iets met canvas te maken. Hierboven zie je het resultaat. Misschien wil jij het ook maken. Je kunt hieronder lezen hoe ik het gedaan heb. Wil je het gat en het dakje met de cricut snijden, dan is hier de file. Download hier de file met de quotes.

Schilder de buitenkant en de randen van de twee canvassen. Snij uit dessinpapier twee stukken van 14 cm x 14 cm. Plak 1 stuk op grijsboard van 14 cm x 14 cm. Snij uit het midden een rond gat van ongeveer 5 cm. Maak in het canvas een gat. Plak achter het gat een stukje transparant plastic met dubbelzijdig tape. Plak het vierkant met grijsboard met dubbelzijdig tape op de voorkant. Snij van grijsboard een dakje en beplak het aan twee kanten met dessinpapier. Plak het dak met dubbelzijdig tape op het canvas. Plak aan de achterkant het andere vierkant met het gat eruit. Snij een strook stevig papier van 10 cm x 20 cm. Ril de strook in de lengte op 3 cm, 5 cm, 7 cm. Gebruik deze strook om de twee canvassen aan elkaar te maken. Plak de strook met tacky tape vast op de houten rand van het voorste canvas. Plak de andere kant van 3 cm op de canvas aan de achterkant. Plak de rug dicht met tacky tape. Snij een stuk cardstock van 20 cm x 28 cm. Vouw deze in de lengte dubbel. Gebruik een cirkel pons om uit de bovenkant een hap te halen. Je kunt nu deze envelop met dubbelzijdig op de vouw tussen de twee canvassen plakken. Laat de bovenkant open. Maak van een strook papier een label van 18,5 cm x 10 cm. Versier het canvas nu met dessinpapier, gestanste vormen, nep klimop, kant, etc. Stans of snij fotomatjes en plak ze in het boek. Tenslotte nog foto’s erin en het boek is klaar.

I couldn't help making another canvas. This time with a house on it. Maybe you would like to make this too. If you want to use your cricut you can download the file here. If you want to use the quotes you can download the file here.

Paint the canvasses. Cut two pieces of dessinpaper 20 cm x 20 cm. Put one of them on chipboard. Cut holes in the middle. Cut a hole in one of the canvasses and put transparent sheet behind it. Paste the chipboard house to the canvas using double adhesive tape. Put the onther one on the back of the canvas. Cut a roof with chipboard and paste dessinpaper to the front and back. Put it on the canvas. Cut a piece of paper 20 cm x 10 cm. Score it at 3cm, 5 cm and 7 cm. This is the hinge that will go between the two canvasses. Use tacky tape to tape it to the two canvasses. Cut cardstock 20 cm x 28 cm and fold it in half. Use a circle punch and punch half a hole. Use tacky tape to tape it to the fold in the middle to creat an envelop. Put a tag in it 18,5 cm x 10 cm. Cut strips of paper 2 cm. Use them to cover op the sides of the canvas. Now you can embellish it with lace, sizzix dies, leaves, flowers, quotes and patterned paper. Just add photo's and you are done.

donderdag 8 juli 2010

Paper mache letters


Je kunt ze kant en klaar kopen of... lekker zelf maken. Ik wilde heel graag het woord home in 3d maken, maar kon nergens de letters krijgen of moest er veel te veel voor betalen. Op internet vond ik het volgende filmpje:


Je kunt natuurlijk fijn je cricut gebruiken om de letters te snijden. Ik heb zelf geen lijm gemaakt, zoals op het filmpje, maar ik gebruike behanglijm. De letters zijn beplakt met natuurpapier. Daarna lekker los gaan met diverse embellishments en leuke afdrukjes van Magnolia.
I wanted to buy big 3d letters, but first couldn't find them. Then I found them, but thought they where too expensive. So I made them myself. Just check out these You tube movies. You can use your cricut to make the letters. I didn't make my own glue. I just used wallpaper glue. I used nature paper and embellished home with flowers, wooden elements and Magnolia.

maandag 5 juli 2010

Taart ezelkaart/ Cake Easelcard


Daar ben ik weer. Even weinig tijd gehad i.v.m. werk, maar nu weer helemaal terug. Ik heb een leuke taart voor jullie gemaakt en het fijne is, dat je er geen troep van krijgt, geen vieze handen en de oven hoeft niet aan. Ik hoop dat jullie het leuk vinden. Wil je ook een taart maken? Download dan hier de file (SCAL 2.0). De werkwijze is hetzelfde als bij iedere ezelkaart. Snij de basiskaart. Snij een losse taart voor de voorkant. Snij alle delen en plak hem in elkaar. Lekker versieren met allerlei kant en bloemetjes. Bovenop een leuke magnolia en klaar is... Nancy. Je kunt er alle kanten mee op. Ik heb hem gemaakt als bruidstaart en als verjaardagstaart. O ja, het papier is van de Action en het kant heb ik vastgeplakt met tacky tape.

Hi, I'm back. I had little time because of my work, but now I am back again. I made a nice cake for you. And the nice thing is it won't leave a mess, doesn't get your hands dirty en doesn't need to bake in the oven. I hope you will enjoy it. Would you like to make the cake? Just click here to download the file (SCAL 2.0). It is an easelcard, so it works just like that. First cut the card base and a cake. Then put all the pieces together to make te cake. Embellish with lace and some flowers. Put magnolia on top and you are ready to go. I made a bridal cake and a birtday cake. I'm sure you can find nice purposes for this cake. Just have fun with it!

vrijdag 21 mei 2010

Aardbei project/ Strawberry project


Met dit mooie weer krijg je echt zin in deze zomerkoninkjes. Daarom dit aardbei project. Verder ook voor mijn vriendin Connie. Zij vindt aardbeien heerlijk, maar is er heel erg allergisch voor. De gemaakte spullen heb ik dan ook aan haar gegeven met achterop de boodschap: "Deze mag je wel!". Natuurlijk kunnen jullie ook deze leuke kaart en andere projecten maken. Ik heb er snijfiles en een beschrijving van. Wil je deze downloaden, plaats een reactie onder dit bericht en stuur een mail naar knutsel100nl@yahoo.com. Ik geef je dan het wachtwoord om de bestanden te kunnen downloaden. Wil je de snijfile (SCAL 2.0)? Klik dan hier en hier (2 files). De beschrijving kun je hier downloaden. Bij de beschrijving zitten ook mallen voor de mensen, die geen cricut bezitten. Je kunt het project ook makkelijk met de hand knippen of snijden. Verder kun je de recepten hier downloaden. Veel plezier ermee.

The weather is fine in Holland. We call strawberries summerkings. That is why I made this project. And also for my friend Connie. She loves strawberries, but can't eat them because she is allergic to them. I gave the things I made to her and added the following message: This one you can have. I made cutfiles and a description. If you want the files to the project just leave a comment to this poste and mail me at knutsel100nl@yahoo.com. I will mail you the password to download the files. If you want the cutfile (SCAL 2.0) just click here and here (2 files). If you want the description (in English) just click here. If you don't have a cricut you can cut it by hand for the templates are included in the description. Have fun!

maandag 10 mei 2010

Nieuwe kaarten/ New cards


Behalve deze blog heb ik nog twee blogs. Ook daar zet ik af en toe dingen op. Ik heb nu twee projecten toegevoegd aan http://www.cardmakerlover.blogspot.com/. Neem daar maar eens een kijkje voor de beschrijving van de projecten, die je hierboven ziet.

I have two more blogs. On occasion I will put some projects over there. Today I've added two projects to http://www.cardmakerlover.blogspot.com/. Just take a look over there to read how I've made the two projects you can see on the pictures.

vrijdag 7 mei 2010

Home sweet home


Deze keer geen kaart, maar een home decor onderwerp. Een leuk huisje met een boekje erin. Het leuke is, dat het eventueel op te sturen is, omdat het niet dikker is dan 2,5 cm. Leuk om naar iemand te sturen, die net een nieuw huis heeft. Wil je het ook maken, dan kun je de beschrijving hier downloaden. Je hebt er niet perse een cricut voor nodig om te maken, maar voor degenen, die wel in het bezit zijn, download hier de cutfile (SCAL 2.0).

This time a home decor project. This cute house has a book inside. The fun thing is you can even send it by mail to somebody who just got a new home. Would you love to make it. You can download the description here. You don't need a cricut to make it, but if you do have a cricut you can download the cutfile here (SCAL 2.0).

zondag 2 mei 2010

3D baby schoen/ 3D baby shoe

Op het cricut forum zochten ze nog iemand die de file voor deze babyschoentjes kon maken. Ik heb mijn best gedaan en hier het resultaat. Wil je ze ook maken, dan kun je hier de file downloaden. Het is Scal 2.0.

On the cricut messageboard they where looking for somebody to make the file of these 3D baby shoes. I did my best and here is the result. Would you like to make them, just download the file here. It is Scal 2.0.

Hier nog een leuke link naar een site waar iemand hele leuke dingen heeft gedaan met deze babyschoentjes/ A link to a site with a nice project with the 3D babyshoe:
Foliescrap I did not make the project on this photo.

Here is a link to an explosion box using the little baby shoes. It is super cute. Thanks Ingrid oder Danke Ingrid:
http://www.annasart.de/?p=864

zaterdag 1 mei 2010

Baby schoen/ Baby shoe


Op internet kwam ik een leuke kaart tegen met daarop hele simpele baby schoentjes. Ik vond het zo leuk , dat ik er een patroon van gemaakt heb. Je kunt het patroon zelf knippen/snijden of je kunt de cutfile voor SCAL 2.0 gebruiken om alles te snijden. Ik heb er veel werk aan gehad en daarom heb ik een wachtwoord op de files gezet. Je kunt het wachtwoord krijgen door een bericht op mijn site achter te laten en daarna mij een mail te sturen naar knutsel100nl@yahoo.com met als onderwerp babyschoen. De cutfile kun je hier downloaden. Klik hier voor de beschrijving.

On the internet I saw a cute card with a simple baby shoes. I thought it would be fun to create a template. You can cut the template by hand or you can use the cutfile (SCAL 2.0). It cost me a lot of time to make the cutfile and the description so I put a password on it. You can get the files by adding a comment to this post and sending me a mail at knutsel100nl@yahoo.com. Put baby shoe in the subject. You can download the cutfile here. You can download the description here. It is in English.
Thanks for all your compliments. I read that people say, they can't read the description. I made a Dutch and an English version. So everybody who can read English can download the description in English.

woensdag 28 april 2010

Pimp je auto/ pimp your car


Dit zijn geen recente projecten, maar ik vind het toch leuk om het hier te laten zien. Het is ook weer iets dat je kunt doen met een cricut. Je kunt er je auto mee pimpen. De bovenste foto is mijn eigen auto en de onderste die van iemand uit de buurt, die kwam vragen of ik alsjeblieft ook haar auto wilde pimpen. Het plakfolie krijg ik altijd van iemand met een beletteringsbedrijf. Hij gooit het anders gewoon weg.
Als je zelf folie wilt snijden, dan zet je het mes op 3 en ook de druk op standje 3 of med. De kunst is om niet door de achterkant heen te snijden. Je haalt dan al het folie weg, dat je niet gaat gebruiken. Neem breed schilderstape en plak dit er op, todat je hele afbeelding of tekst beplakt is. Nu kun je de tekst of afbeelding in zijn geheel overzetten op een andere plek, bijvoorbeeld een auto.

These projects I did some time ago, but I love to show you, because you can see what else you can do with your cricut. The first car is my own and the second is from a neighbour (I didn't know her) who came to my house and asked me to pimp her car. I get the vinyl from a company. It is all leftovers.
If you want to cut vinyl, your machine settings will be knife 3 and pressure 3 or med. Don't cut through the backing of the vinyl. Then just peel of all the things you don't need. Use painters tape and paste over your image or text. Now you can take the backing away. Paste it to a car and then peel away the painters tape. Use the tape as a transfer medium (I use real transfer tape, but it is expensive).
Here my tutorial on youtube http://www.youtube.com/watch?v=YGrnkFRTDPo (I hate my english on the tape, but it was my first one).

maandag 26 april 2010

Vlinder ezelkaart/ Butterfly Easelcard

Misschien moet ik nu maar stoppen met deze vorm van kaarten maken. Het is echt leuk om ze te verzinnen. Het idee om twee vormen te gebruiken heb ik weer opgedaan bij een yahoo groep waar ik bij hoor. Het papier is deze keer van Tilda. Ik heb er een mini-Magnolia op gedaan. Nou op naar de volgend kaart of.... misschien eens een ander project. Klik hier om de file te downloaden! (SCAL 2.0)

Maybe I should stop making this kind of cards. It is so much fun making them. The idea to use two different shapes I got from a yahoo group. The paper is Tilda and I put a mini Magnolia on the card. Get ready for the next card or... maybe something different this time. Just click here to get the file. (SCAL 2.0)
Here a link to Ingrids blog. She already made the butterfly easelcard. Check it out at:

zondag 25 april 2010

Sneeuwvlok Ezelkaart/ snowflake easelcard

Ik hoop dat ik jullie niet verveel, maar het leek me wel een uitdaging om van een sneeuwvlok een ezelkaart te maken. Ik heb het geprobeerd en vind het resultaat best wel leuk. Daarom wil ik de file ook graag met jullie delen. De stempel is van Magnolia en ik gebruikte dessinpapier van Basic Grey. De file kun je hier downloaden (SCAL 2.0).

I hope I am not boring you with yet another easelcard. I thought it was a challenge to make an easelcard snowflake shaped. It think it turned out pretty nice. That is why I would love to share the file with you. The stamp I used is Magnolia and the dessinpaper is Basic Grey. You can download the file here (SCAL 2.0).

Scallop cirkel Ezelkaart/ Scallop circle easelcard

Je kunt ze dus echt in allerlei vormen maken en het blijft allemaal leuk. Hierbij een leuke file voor een scallop cirkel ezelkaart. Het papier dat gebruikt is, is van Basic Grey. Wil je de kaart ook maken? Klik hier voor de file (SCAL 2.0).

You can make them in any shape and it is pure fun. I'd like to give you the file to make a scallop circle easelcard. The paper I used is Basic Grey. Would you like to make this card? Click here to make the card (SCAL 2.0).

donderdag 15 april 2010

Hart ezelkaart/ Heart Easelcard.


Op de stempelbeurs in Zeist zag ik een leuke ezelkaart in de vorm van een hart. Leuke uitdaging om die met de cricut te maken. Zoals jullie zien is het mij gelukt. Ik heb de file voor jullie om te gaan gebruiken. Je kunt hier klikken. Het gaat om een SCAL 2.0 file. Veel plezier ermee! P.s. ik zou het leuk vinden als je even een reactie achterlaat.

At the stampfair I saw a nice easelcard shaped like a heart. I thought it is a nice challenge to make one with the cricut. I tried and it worked. I am willing to share the file with you, so you can make the card too. If you want the file just click here. It is a SCAL 2.0 file. Enjoy it! P.s. I would love it if you leave me a comment.

vrijdag 9 april 2010

Voorjaarskaart/ Spring card


Soms heb je een idee. Ik dacht, kom ik maak een kaart uit lagen papier. Ik gebruikte de cricut om 4 vierkanten te snijden met daaruit een steeds kleinere cirkel. Ik heb sommige stukken bewerkt met de embossingmallen van de cuttlebug. Ik heb ze met foamtape op elkaar geplakt en daarna op een vierkante kaart. Aan de binnenkant heb ik de overgebleven cirkels gebruikt. Een paar vlinders en bloemen erop. Tot slot heb ik er ook nog op gestempeld. Dit kan met een clearstamp zonder blok. Wil je de kaart ook maken? Klik dan hier voor de file. Het is een SCAL 2.0 file. Je kunt dit idee natuurlijk ook met de designstudio maken. Een andere vorm is ook mogelijk.

Sometimes you have an idea. I thought of making a card with different layers paper. I used my cricut to cut 4 squares with circles inside. I made the circles smaller each time. I used the cuttlebug to emboss some parts of it. Then paste them together using foamtape. The left over circles are used on the inside of my card. I stamped on it with a clear stamp swirl without a stampingblock. Embellish it with some flowers and butterflies. Would you like to make the card? Here is the file. It is a SCAL 2.0 file. Of course you can make this card using the designstudio. Different shapes would also be nice.

vrijdag 19 maart 2010

Tulp kaart/ Tulip card


Bovenstaande kaart is gemaakt door Jannita. Ik vind hem echt prachtig. Ze heeft me even de foto gemaild. De rest van de bloem kun je bekijken op haar eigen site: http://stempelalbum.blogspot.com/


Jannita made this tulipcard. I just love it. She mailed me the picture. If you want to see all of the pictures, just visite here site: http://stempelalbum.blogspot.com/
Another link to somebody who made the tulip card. It is Regina. Just check it out here.


Het idee voor deze tulp kaart komt uit de Cards Only. Helaas stond er geen beschrijving bij, dus heb ik die zelf gemaakt. Ik heb zelf bedacht om er pockets in te maken, waarin je labels met zakjes zaad kunt doen. Zo heb je een leuk cadeautje. Wil je de beschrijving? Dat kan. Je moet er alleen wel iets voor doen. Laat een bericht achter op mijn blog en mail naar knutsel100nl@yahoo.com met als onderwerp wachtwoord tulp kaart. Je kunt met dat wachtwoord de beschrijving hier downloaden. De cutfile voor deze kaart kun je hier downloaden met het zelfde wachtwoord.


The idea for this tulip card came from a magazine, but there was no description. I made it myself. I thought it was a nice idea to create pockets so you can add tags and some seeds. It will make a nice gift. If you would like to have the description, you have to leave a comment to my blog and mail me at knutsel100nl@yahoo.com. You have to put password tulip card in the subject line. I will email you the password so you can download the description here. You can download the cutfile here using the same password.
Here a link to the blog of lynn. She also made the card:

vrijdag 5 maart 2010

Milka heart chocolade


Morgen heb ik een verjaardag en degene weet niets voor haar verjaardag. Dat wordt dus geld geven. Ik vind dat niet zo leuk en daarom heb ik een doosje met milka chocolade veranderd in een kaart/cadeau. De doosjes zijn voor € 0,99 te koop bij het kruidvat.
Eerst sneed ik 2x de file met het scallop hart en het gewone hart. Ik plakte gewoon cardstock en dessinpapier op de mat. De twee scallop harten komen op het doosje. De twee gewone harten in het midden van de scallop. Van het overgebleven dessinpapier maakte ik op de achterkant een pocket, zodat daar later het geld in kan. De voorkant heb ik versierd met een plaatje van Magnolia met een emmer aardbei (bloemen nu dus), heel veel bloemetjes en een ovaal (afval van een kartonage fabriek) met tekst. Ook op de achterkant veel bloemen en het envelopje. Stukje organza aan de bovenkant en klaar is je cadeau/ geldenvelop.
Wil je dit ook maken? Klik dan hier voor de snijfile (SCAL 2).
Tomorrow I have to go to a birthday party, but she didn't know what to ask. I am giving her money, but I don't like it. So I made this little present for her. I used a heartshaped box with chocolates as a base. Cut the file twice and paste the scallop hearts to the front and back of the box. Then put the hearts made from dessinpaper on top. Added a colored stamp and a lot of flowers. The oval shape are scrap from a paper factory. On the back I made a pocket using the leftover dessinpaper, so I can put money in it.
If you want to make this? Here is the cutfile (SCAL 2)